Make: Mini Sukkah
At sundown on Sunday, October 9th, the week-long, Jewish celebration of Sukkot, or the Harvest Festival, begins. Central to this holiday is the sukkah, or hut, that many Jews still build to this day. The sukkah is meant to be a temporary dwelling, consisting of 3 sides and a shaded rooftop. We won’t get into the intricacies behind the history and meaning of the sukkah, but we encourage you to learn more about it! A great resource is My Jewish Learning.
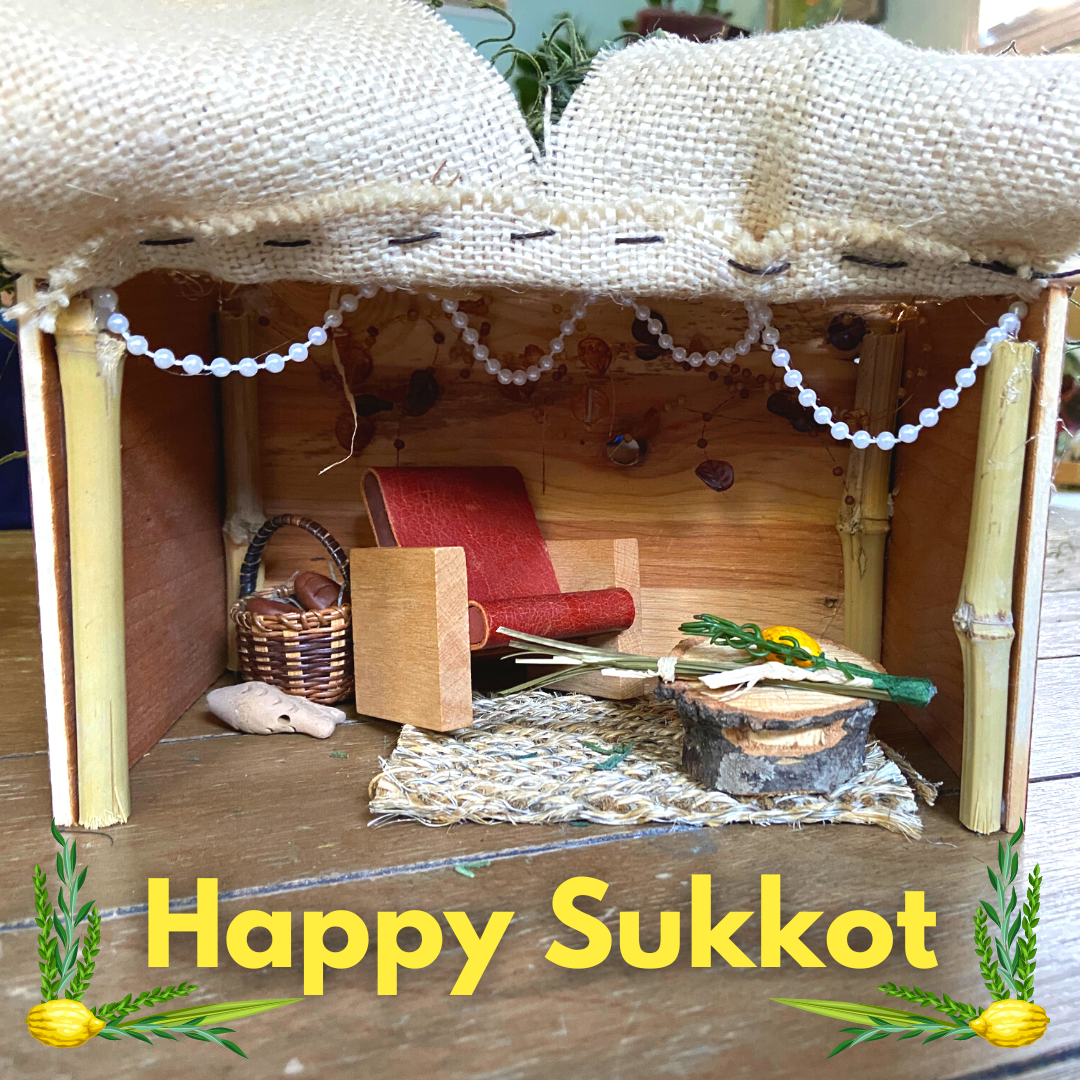
While we weren’t able to build a full-scale sukkah, we hope this tutorial for a mini version will help to get you into the spirit of the holiday!
Instructions
STEP 1: Gather Supplies
Hot glue gun & extra glue sticks
Floral tape or similar
Wood scraps and dowels
Natural materials such as reeds, moss, bamboo, burlap, etc
Decor of your choice
To make my sukkah, I scrounged the Bucket area at ACR and grabbed whatever materials I thought may be of use, without a specific plan in mind. There’s no single, correct way to build a sukkah, the whole point is that you are using the abundant, natural resources around you.

STEP 2: Build the Walls
I used a piece of scrap wood that I already had, as well as a wooden design sample from ACR that I cut in half to create the 3 walls. I simply hot glued them at the corners and it held surprisingly well!

STEP 3: Add the Roof
For the roof, I used wooden chopsticks that were the perfect width to span across. I then loosely covered them with some straw and moss, making sure that you could still see through to the sky.


STEP 4: Create a Door (optional)
To make my sukkah a little more home-like, I wanted to add a door. I took a small piece of burlap scrap and folded the top edge over a wooden chopstick. I then used some twine to do a quick running stitch to secure the burlap around the chopstick. Finally, I hot glued the ends of the chopsticks to the side walls, and cut a slit in the middle of the burlap to create the entrance.


STEP 5: Decorate!
Now, the fun part! Even though sukkahs are meant to be temporary, it doesn’t mean they have to be boring! Use whatever you’d like to decorate the inside (and outside, if you choose) of your sukkah to make it feel more like home. I added a wood scrap that I thought looked like a table, some brown leaf bead garlands that I found, a mini basket with mini bread loaves, bamboo pillars in each corner, and a design sample that I thought looked like a mini rug. I went through a couple layouts before deciding on the one I liked best.
Finally, I took some of the scraps of reeds, straw, and fake floral sprigs, and secured them together with floral tape at the end to look like a mini lulav. Then I took one of the beads and painted it yellow to look like a mini etrog.


That’s it! Now that you’ve finished your sukkah, you can kick back, relax, and enjoy the festivities of Sukkot!